
Ontario Fireplace & Chimney Specialists
Wood Stove Installation in Mississauga
Real heat, installed to the appliance's listing so your insurer is satisfied.
Every job starts with a proper look at your system — not a guess over the phone. You get a written quote before any work begins, a clear explanation of what we found, and a technician who works to manufacturer and code requirements from start to finish.
- Written quotes, no surprise charges
- Photo-backed findings after every visit
- Work performed to code and manufacturer specs
- Serving Mississauga and Peel Region, year-round
Wood Stove Installation for Mississauga homes
Mississauga grew largely through the 1970s to 1990s, so factory-built fireplaces venting through framed chases are the dominant type, with older Port Credit and Streetsville properties adding a layer of traditional masonry.
Chase cover failure is the most common call in this city, because the galvanised pans fitted on subdivision-era chases have reached the end of their life more or less simultaneously. Rust streaks down the siding are the giveaway.
A wood stove installation lives or dies on clearances and chimney quality. Clearance to combustibles, hearth pad size and R-value, and the height and configuration of the chimney all come from the appliance's listing rather than from custom.
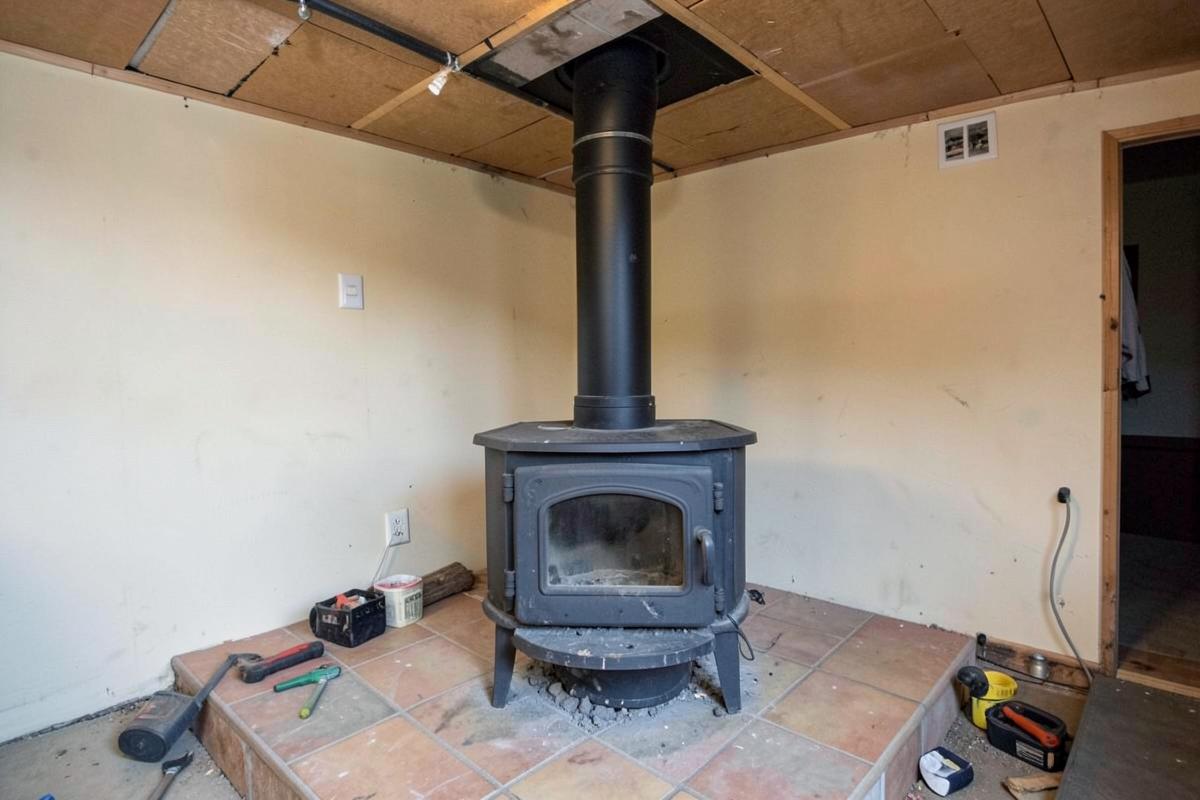
We plan the location and chimney route, build or supply the hearth pad, install a listed insulated chimney system, and document clearances and specifications so the installation can be verified by an insurer or inspector later.
What the visit includes
- Location, clearance and hearth pad planning
- Listed insulated chimney system installation
- Wall or roof penetration with correct thimble or support box
- Stove setting, connection and floor protection
- Commissioning, break-in guidance and documentation
Signs you need this
- You want heat that works in a power outage
- You are heating a cottage, workshop or addition
- An old stove was removed and you want it back
- Your insurer has asked for a documented installation
Areas we cover around Mississauga
Port Credit · Streetsville · Erin Mills · Meadowvale · Malton · Clarkson
A wood stove installation is really an exercise in following the appliance's own listing to the letter, because every clearance, hearth pad dimension and chimney configuration on a certified stove comes from testing that appliance did to earn its listing in the first place, not from general rules of thumb. Get the clearances and chimney right and the stove performs exactly as tested; cut corners on either and you introduce risk that no amount of careful use afterward can fully correct. Two stoves that look nearly identical on a showroom floor can carry very different clearance tables depending on how their rear heat shield or firebox lining was tested, so a plan built around one model rarely transfers cleanly to another without rechecking the numbers.
Ontario's appeal for wood heat is straightforward: it works when the power is out, it heats cottages and workshops with no other practical heating option, and it gives homeowners a real secondary heat source that does not depend on gas prices or grid reliability. The installation itself has to account for genuinely cold winters, meaning chimney height, insulation and termination location all get planned with wind-loading and creosote condensation in mind rather than treated as an afterthought. Rural properties and lakefront cottages, where a downed line during an ice storm can mean days without grid power, are a common reason homeowners commit to a proper stove installation rather than a portable heater as a backup plan.
Because a wood stove is a solid-fuel appliance producing real, sustained heat, the margin for error on clearances is smaller than with gas or electric units. A stove placed too close to a wall, or connected to an undersized or poorly routed chimney, does not just underperform, it can develop a genuine fire risk over months or years of normal use, which is why this installation gets planned in detail before a single component goes in. Floor protection, wall framing behind the finished surface, and the path a chimney will take through an attic or roof cavity all get walked through on-site before ordering any parts, since discovering a joist or truss in the wrong place after purchase turns a planned installation into an improvised one.
How a wood stove installation is planned and built
Planning starts with the stove's listing label, which specifies minimum clearance to combustible walls and ceilings, required hearth pad dimensions and R-value, and acceptable chimney configurations. Every other decision in the installation flows from that label rather than from the room's layout, which means the stove's final position sometimes surprises homeowners who pictured it somewhere the clearances simply will not allow. A corner placement that looked ideal on paper sometimes fails the clearance test on two walls at once, which is why measurements are taken against the actual label figures before any framing or hearth work is scheduled, rather than eyeballed against a floor plan.
With location confirmed, the hearth pad is built or supplied to the specified size and insulating value, since it protects the floor from radiant and conducted heat rather than acting as purely decorative flooring. A listed, insulated chimney system is then routed through a wall thimble or ceiling support box, sized and configured to the stove manufacturer's specifications for height and horizontal offset. On a finished basement or main-floor family room, this often means opening a section of ceiling or roof deck that was never meant to be touched again, so scheduling the drywall, insulation and roofing trades needed to close that penetration back up cleanly is as much a part of the job as the chimney itself.
Once the chimney is in and the stove is set and connected, the whole system is commissioned with a proper break-in fire, following the stove manufacturer's specific curing schedule for any high-temperature paint or gasket material, and all clearance measurements are documented for the homeowner's records. That first fire is also when a technician watches for smoke leaking around a poorly seated flue collar or a connector pipe joint that was not seated fully home, since minor fitment issues reveal themselves under real heat far more clearly than they do during a cold, dry test-fit.
Chimney systems and routing options
Most modern wood stove installations use a factory-built, listed insulated chimney system rather than masonry, since it is engineered specifically to the stove's certified configuration and is generally faster and less costly to install correctly. These systems route either straight up through the roof or out through a wall and up the exterior, each requiring a different support and thimble arrangement.
Through-the-roof routing generally performs better for draft because the entire chimney stays warmer inside conditioned space for longer before reaching outside air, which reduces creosote condensation compared to an exterior wall route where more of the chimney length is exposed to outdoor cold. Exterior routing is sometimes chosen anyway for cottages or additions where roof penetration is impractical, but it typically needs additional insulation to perform comparably.
The horizontal run from the stove's flue collar to the wall thimble also matters more than homeowners expect, since every manufacturer sets a maximum horizontal distance and a minimum rise before the chimney can turn, and exceeding either figure weakens draft regardless of how tall the vertical section above it ends up being. A run planned around the furniture layout rather than the stove's specification sheet is one of the more common reasons an otherwise well-built system still smokes on startup.
- Interior through-the-roof routing: generally best draft performance
- Exterior wall routing: easier retrofit, more exposed to cold
- Ceiling support box required at any ceiling penetration
- Wall thimble required at any wall penetration
- Height above roofline set by code minimum and by the stove's listing
Clearances, hearth pads and the details people underestimate
Clearance to combustibles is not a single number; it varies by wall material, whether a heat shield is used, and the specific stove model, which is why the manufacturer's clearance table, not a generic rule, governs every installation. A heat shield can often reduce required clearance significantly, which matters in smaller rooms where the unshielded clearance would otherwise make placement impossible.
Hearth pad requirements are equally specific: the pad must extend a set distance in front of, and to the sides of, the stove's loading door and ash removal point, sized to the appliance's listing rather than a generic hearth size. Underbuilding the hearth pad, either in area or in insulating R-value, is one of the more common installation shortcuts, and it is one that is expensive and disruptive to correct after the fact once flooring and trim are finished around it.
The connector pipe between the stove's flue collar and the chimney system has its own clearance rules as well, separate from the stove body itself, and single-wall connector pipe generally needs more clearance to combustibles than double-wall pipe, which can make double-wall connector the more practical choice in a tight installation even though it costs somewhat more per section. Homeowners sometimes assume clearance planning ends at the stove itself, when in practice the connector run through the room is measured just as carefully.
Cold-climate performance and Ontario-specific factors
Wood stoves depend on a healthy draft to perform correctly, and draft is strongly affected by chimney height, insulation and how exposed the termination point is to wind. In much of Ontario, a chimney that is too short relative to nearby rooflines or trees can struggle with draft on windy days regardless of how well the stove itself is built, producing smoke spillage into the room when the door is opened.
Insulated chimney sections keep flue gases warmer through their run to the outside, which both improves draft and reduces creosote condensation, a genuine concern given how many Ontario burning seasons run from October through April with sustained cold overnight temperatures. Choosing an adequately insulated system, and routing it to minimize exterior exposure, pays off directly in easier lighting and lower creosote buildup over a season.
Wind exposure at the termination point deserves its own attention in open rural settings and on lakefront properties, where sustained crosswinds can overpower a marginal chimney height and push smoke back down into the room each time the loading door opens. A termination cap suited to windy sites, combined with height that clears nearby rooflines by the margin the stove's listing calls for, resolves most of these complaints without requiring any change to the stove itself.
Code, listing and what an inspector actually verifies
Wood stove installations fall under the solid-fuel provisions of the Ontario Building Code together with the appliance's own CSA or ULC listing, and installers who hold WETT certification are trained specifically to install and inspect to those combined standards. An inspector or insurer reviewing the work checks that the specific stove model's clearance table was followed, that the chimney system used is listed for that stove, and that the hearth pad meets the specified dimensions and R-value.
None of these checks are arbitrary. Clearance tables come from actual fire testing of each stove model, chimney listings come from testing the assembly at sustained high flue temperatures, and hearth pad specifications come from measuring radiant heat at the floor during a full burn. Following them is what allows an installation to be verified later by someone who was not present for the work.
Municipalities in Ontario vary somewhat in how they administer permits for solid-fuel appliance installations, and some require an inspection tied specifically to the building permit process rather than relying solely on the installer's own documentation. Confirming local requirements before work begins avoids the awkward situation of a completed installation needing to be partly opened up again for an inspector to view components that are otherwise hidden once trim and finishing are done.
What documentation means for insurance and resale
Home insurers in Ontario frequently ask specifically about wood-burning appliances when underwriting a policy, and a documented installation, including the appliance model, chimney system specifications and clearance measurements, is generally what satisfies that inquiry without delay. Homes with an undocumented, older wood stove installation sometimes face additional underwriting questions or a required inspection before coverage is confirmed.
At resale, a wood stove with clear installation documentation reads as a cared-for feature rather than an unknown liability, and buyers or their agents increasingly ask for exactly this kind of paperwork when a solid-fuel appliance is part of the sale. Keeping the commissioning report, clearance measurements and chimney specification sheet together is a small effort that pays off directly at either of these moments.
A lender's home inspector or a buyer's own inspector may not be trained specifically in solid-fuel appliances, and in that gap, having the original installer's paperwork on hand answers questions that an inspection alone cannot, such as whether the chimney system is actually listed for the stove model in place rather than simply present and apparently intact.
Choosing a stove size and style for the space
Stove sizing is measured in heating capacity relative to a space's square footage and insulation quality, and buying larger than the room actually needs is a common misstep that leads to a stove run constantly damped down, which burns less efficiently and produces more creosote than one sized to run closer to its intended output. A stove sized for the room, run at a healthy, active burn, generally outperforms an oversized one throttled down to avoid overheating the space.
Style choices, cast iron versus steel body, a traditional look versus a more contemporary glass-heavy design, come down largely to preference once the functional requirements are met, though cast iron stoves tend to hold and release heat more gradually while steel bodies respond somewhat faster to air control adjustments. Neither is inherently better; the right choice depends on whether steady, even heat or quicker responsiveness matters more in that particular room.
Freestanding stoves and fireplace inserts, which fit into an existing masonry firebox rather than standing independently, are sometimes confused with each other but involve different clearance and chimney considerations entirely, and a homeowner replacing an old fireplace with a wood-burning insert should expect a somewhat different planning conversation than one adding a freestanding stove to an open room.
Wood Stove Installation cost in Mississauga
A complete wood stove installation in Ontario typically averages around $5,000 including chimney, hearth pad and commissioning.
| Work | Typical range | What moves the price |
|---|---|---|
| Wood stove installation, straightforward interior chimney routechimney height and roof penetration complexity | $3,800 – $6,500 | chimney height and roof penetration complexity |
| Exterior wall chimney routingwall thickness and support bracket requirements | $4,200 – $7,200 | wall thickness and support bracket requirements |
| Hearth pad construction to appliance specificationsize and finish material chosen | $500 – $1,400 | size and finish material chosen |
| Wall thimble or ceiling support box installationpenetration type and framing complexity | $350 – $750 | penetration type and framing complexity |
| Stove supply and setting only (chimney already present)stove size and connector configuration | $600 – $1,200 | stove size and connector configuration |
| Commissioning, documentation and break-in guidanceusually bundled into the full installation price | $150 – $260 | usually bundled into the full installation price |
Ranges are estimates for planning only, not quotes. Final pricing depends on what we find on site, access, and the condition of the existing system.
What moves the price
- Chimney routing through the roof versus an exterior wall
- Chimney height required for adequate draft and code clearance
- Hearth pad size and insulating material chosen
- Whether an existing masonry chimney is reused or a new listed system installed
- Stove size and BTU output relative to the space being heated
- Access difficulty for the specific roof or wall penetration
Want a number for your own fireplace? Send us the details and we will come back with an estimate, or call (833) 949-4153.
How the work goes, step by step
- 1
Location and clearance planning
The stove's listing label is reviewed to confirm clearances to combustibles, and a location is chosen in the room that satisfies those clearances without a heat shield, or with one if space is limited.
- 2
Hearth pad construction
A hearth pad is built or supplied to the exact dimensions and R-value the appliance's listing specifies, extending the required distance in front of and beside the loading and ash removal points.
- 3
Chimney routing and penetration
A listed insulated chimney system is routed through a properly sized wall thimble or ceiling support box, following the manufacturer's specified height and offset limits for that stove model.
- 4
Stove setting and connection
The stove is set into its final position, levelled, and connected to the chimney system with the connector pipe sized and configured to the appliance's requirements.
- 5
Commissioning and break-in fire
A controlled break-in fire is run following the stove manufacturer's curing schedule for paint and gasket materials, while draft and door seal performance are observed directly.
- 6
Documentation handover
Clearance measurements, chimney specifications and appliance details are compiled into a document the homeowner can provide to an insurer, inspector or future buyer without further explanation.
How long it takes: A standard interior chimney route installation typically takes one to two days; exterior wall routing or difficult roof access can extend that to three days.
Looking after it afterwards
- Season firewood properly before burning; wet wood drives most creosote buildup
- Book an annual sweep and inspection before each heating season
- Keep the clearance zone around the stove free of furniture and stored items
- Check the door gasket seal at the start of each season using a paper-strip test
- Keep installation documentation on file for insurance and resale purposes
Mistakes we see most often
- Choosing stove placement before checking the model's actual clearance requirements
- Undersizing the hearth pad to save on flooring material
- Reusing an old masonry chimney without confirming it matches the new stove's listing
- Burning unseasoned wood immediately after installation
- Skipping the break-in fire schedule and running the stove at full output immediately
Questions homeowners ask
- Will my insurance company need paperwork?
- Most do. We provide the appliance details, clearance measurements and chimney specifications in a form insurers generally accept.
- Can a stove use my existing masonry chimney?
- Sometimes, with a correctly sized insulated liner. The flue is almost always too large for a modern stove without relining.
- Can I use my existing masonry chimney for a new wood stove?
- Sometimes, but the chimney needs to be inspected and often relined to match the specific stove's outlet size and the flue's condition confirmed structurally sound, since an existing chimney built for an old fireplace is rarely already sized correctly for a new stove.
- How high does the chimney need to be?
- Height requirements combine a general code minimum above the roofline with the specific stove manufacturer's listed minimum for adequate draft, and the taller of the two generally governs the final installed height.
- Does the hearth pad need to be a certain size?
- Yes, and the required dimensions come directly from the stove's listing rather than a fixed standard size, typically extending further in front of the loading door than to the sides.
- Will a wood stove work during a power outage?
- Yes, a properly installed wood stove with no electrical components required for its core function will heat during an outage, which is one of the main reasons Ontario homeowners choose one as backup heat.
- How much of my home can a wood stove realistically heat?
- It depends heavily on the stove's BTU rating, the home's layout and insulation, and whether air can circulate to adjoining rooms; a single stove typically heats the room it is in well and adjoining open-concept space reasonably, rather than an entire multi-storey home evenly.
- Do I need to tell my insurance company about a new wood stove?
- Yes, most Ontario home insurers specifically ask about solid-fuel appliances and want documentation of a proper installation, so notifying them with the installation details is worth doing proactively rather than waiting for a renewal question.
- Can a wood stove be installed in a mobile home or cottage without a basement?
- It generally can, but factory-built homes and cottages built on piers or a crawl space sometimes need extra floor reinforcement under the hearth pad and a different thimble arrangement, so these builds are usually assessed individually rather than treated like a standard on-grade installation.
- How is a freestanding stove different from a wood-burning insert for planning purposes?
- A freestanding stove stands independently in the room and needs full clearance on all sides according to its listing, while an insert fits into an existing masonry firebox and relies on that firebox's opening and the insert's own liner, which generally involves a different set of clearance and venting calculations.
Nearby
Other Communities Near Mississauga
Related work
Often Booked Together
Wood Stove Service in Mississauga
Gasket, baffle, firebrick and air-control service for wood stoves and inserts.
Pellet Stove Service in Mississauga
Deep cleaning and repair of pellet stoves: augers, burn pots, exhaust and control boards.
Chimney Sweeping in Mississauga
Full mechanical sweep of the flue, smoke chamber and firebox with containment and photos.
Chimney Inspection in Mississauga
Documented inspection of the flue, liner and structure with photos and a plain-language report.