
Ontario Fireplace & Chimney Specialists
Fireplace Insert Installation in St. Marys
Turn a decorative masonry opening into a heater that actually holds heat in the room.
Every job starts with a proper look at your system — not a guess over the phone. You get a written quote before any work begins, a clear explanation of what we found, and a technician who works to manufacturer and code requirements from start to finish.
- Written quotes, no surprise charges
- Photo-backed findings after every visit
- Work performed to code and manufacturer specs
- Serving St. Marys and Perth County, year-round
Insert Installation for St. Marys homes
St. Marys is built largely of local limestone, and its chimneys were assembled with lime mortar that hard modern mixes will crack rather than protect.
We treat repointing here as heritage work, matching mortar strength and colour, and we prefer relining to rebuilding wherever original stonework can be preserved.
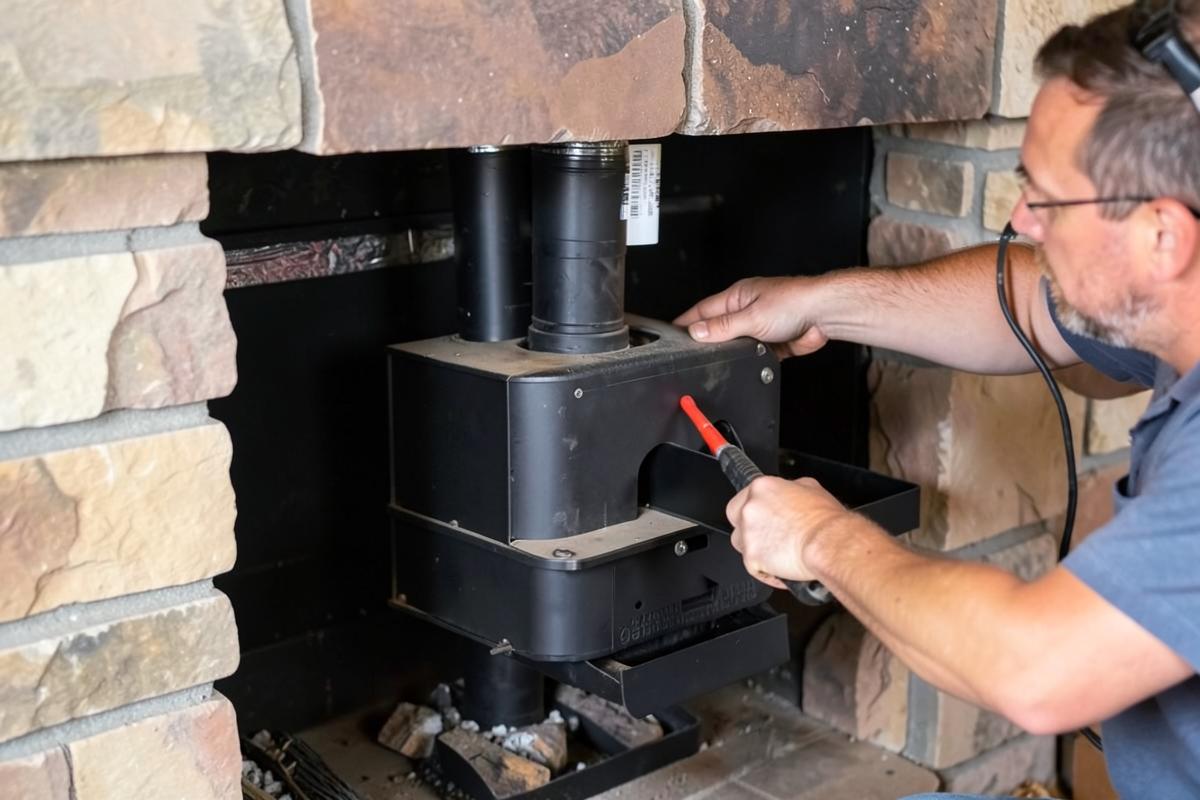
An open masonry fireplace loses far more heat up the flue than it delivers into the room. An insert is a sealed appliance set into the existing opening, with its own liner running to the top of the chimney, so combustion air and heat are both controlled.
The critical detail is the liner. Sizing it to the insert outlet and insulating it correctly is what makes the unit perform as rated and keeps the masonry dry, and it is the step most often skipped on cut-price installations.
What the visit includes
- Opening measurement and appliance fit check
- Correctly sized insulated liner to the flue top
- Insert setting, connection and sealing
- Surround panel and trim fitting
- Commissioning and operating instruction
Signs you need this
- The fireplace feels cold even while burning
- You want usable heat rather than ambience
- The existing masonry firebox is deteriorated
- You are changing from wood to gas or electric
Areas we cover around St. Marys
Kirkton · Granton · Thorndale · Stratford · Embro
An open masonry fireplace is a beautiful thing to look at and a genuinely poor way to heat a room. Most of the warmth it generates goes straight up the flue along with the smoke, and the draft it creates to feed the fire actually pulls already-heated room air out of the house at the same time. An insert changes that equation completely by sealing the appliance and controlling both the combustion air going in and the heat coming out, turning a decorative opening into something that meaningfully warms the room it sits in.
The insert itself — gas, wood, or electric — sits inside the existing masonry opening, but it is not simply slid in and connected. Gas and wood inserts need their own correctly sized liner running the full height of the chimney to the top, separate from whatever oversized flue the masonry fireplace originally used, because that liner is what makes the sealed system actually work as designed.
This is also one of the more common places we find corner-cutting in past installations, since sizing and insulating that liner correctly takes more time and material than simply connecting the insert and calling the job done. Getting it right the first time is what separates an insert that performs to its rating for fifteen years from one that underperforms and damages the surrounding masonry within a few seasons.
Why the existing flue cannot just be reused as-is
A traditional masonry fireplace flue is sized for an open fire drawing a large volume of air, which is many times larger than what a sealed insert's combustion process actually needs. Connecting an insert to that oversized flue without a properly sized liner causes the exhaust gases to cool too much before reaching the top, leading to condensation, poor draft, and creosote buildup that accumulates faster than a normal wood-burning system would produce.
The fix is running a new liner, sized specifically to the insert's flue outlet, from the appliance connection point to the top of the chimney. For gas inserts this is typically a flexible stainless liner; for wood inserts it is usually an insulated rigid or flexible stainless liner rated for solid-fuel temperatures. Either way, the liner is what makes the whole system perform at its rated efficiency rather than well below it.
This is the step most often skipped or done poorly on cut-price insert installations, because it adds real material and labour cost that is invisible once the insert and surround are in place. It is also the step that most affects long-term performance and safety, which is why we treat it as non-negotiable regardless of budget pressure.
Measuring the opening and appliance fit
Before selecting a model, we measure the existing masonry opening's depth, width, height and the flue's internal dimensions, since insert models vary considerably in their footprint and not every unit fits every fireplace. A firebox that looks like standard size to the eye can be a few centimetres off from what a particular insert requires, which rules that model out regardless of how well it suits your heating goals otherwise.
We also check the condition of the existing masonry firebox itself during this step, since an insert installed into a deteriorated firebox is still sitting against damaged material even though it is no longer directly visible. Where the firebox shows significant deterioration, that repair typically needs to happen before or alongside the insert installation rather than being covered up by it.
Where the existing masonry opening is slightly undersized or irregularly shaped for the insert a homeowner has their heart set on, we will say so before ordering rather than after, since minor masonry modification to widen an opening is sometimes possible but adds cost and time that is worth knowing about upfront rather than discovering mid-installation.
- Opening depth, width and height measured against insert specifications
- Existing flue diameter checked for correct liner sizing
- Firebox condition assessed for hidden deterioration
- Hearth extension checked against the insert's clearance requirements
- Surround panel sizing confirmed for a finished, gap-free fit
Gas, wood and electric insert options
Gas inserts are the most popular retrofit choice because they combine strong heat output with the convenience of a switch or remote start, and they need a liner but no chimney sweeping in the traditional sense once installed. Wood inserts retain the traditional burning experience while dramatically improving heat delivery over an open fireplace, though they still need annual sweeping like any solid-fuel appliance.
Electric inserts need no liner or venting at all, making them the simplest and least invasive installation, though they provide supplemental and ambiance heat rather than the higher output of gas or wood options. The choice generally comes down to whether you want a heating appliance you use regularly through winter or an ambiance feature used occasionally, since that changes which fuel type makes the most practical sense for your household.
Blower options and getting heat further into the room
Most gas and wood inserts offer an optional or built-in blower that pulls room air across the firebox and pushes it back out warmed, which meaningfully increases how far the insert's heat actually travels into the room rather than radiating only immediately in front of the opening. For larger or more open-concept rooms, this option is worth the modest additional cost in nearly every case we see.
Blower noise and speed control vary by manufacturer, and some higher-end models offer variable speed control paired with a thermostat so the blower ramps up and down automatically rather than running at a single fixed speed regardless of how warm the room already is. We walk through these options relative to your room size and usage pattern before you commit to a specific model.
It is worth noting that a blower is an electrical component, and its failure does not affect the insert's core heating or combustion safety, only the distribution of the heat produced, which is a useful distinction if a blower motor ever needs replacing down the line.
Ontario climate and efficiency considerations
Sealed inserts are particularly valuable in Ontario's climate because an open fireplace's constant draft loss works directly against a furnace trying to heat the same house through a long winter. Homeowners who switch from an open fireplace to a sealed insert often notice a genuine difference in how warm the room stays and how much less the furnace runs during evening fireplace use.
A correctly insulated liner also matters more here than in milder climates, since flue gas that cools too quickly in cold outdoor conditions condenses faster, and Ontario winters provide plenty of very cold nights for that to happen if the liner is undersized or uninsulated.
Code and safety context
Liner sizing for insert installations follows manufacturer specifications and applicable CSA and WETT-referenced installation standards, and gas insert connections must be completed by a licensed gas technician under Ontario's gas safety framework. These are not optional refinements — an incorrectly sized or uninsulated liner is a recognized cause of chimney fires and carbon monoxide issues, which is why it sits at the centre of any insert inspection.
Clearances between the insert, its surround panels, and any combustible mantel or trim above the opening also need to be verified against the specific appliance's listing, since inserts vary in how much heat they radiate forward compared to the original open fireplace.
Repair versus replace on an existing insert
Where an insert is already installed but underperforming, the fault often traces back to an undersized or damaged liner rather than the appliance itself, and correcting the liner alone can restore expected performance without replacing the whole unit. We check liner condition with a camera inspection before assuming the insert itself needs replacement.
Genuine appliance replacement becomes the right call when the insert's heat exchanger, burner assembly, or firebox has failed beyond economical repair, or when a homeowner wants to change fuel type entirely, since converting fuel type generally means a new appliance and reworked venting rather than a partial swap.
Resale and insurance relevance
A properly installed insert with a documented, correctly sized liner is viewed favourably by both buyers and insurers, since it demonstrates the fireplace was upgraded to current safety and performance standards rather than left as an aging open masonry system. Undocumented or improperly linered inserts, by contrast, are a common finding in pre-purchase inspections and can raise questions about past workmanship.
Keeping the installation paperwork, including liner specifications and appliance model information, gives future buyers or your insurer a clear record of what was done and to what standard, which is worth far more at resale time than the marginal cost saved by skipping proper documentation initially.
Fireplace Insert Installation cost in St. Marys
Most fireplace insert installations in Ontario average between $3,500 and $6,000 depending on fuel type and liner length.
| Work | Typical range | What moves the price |
|---|---|---|
| Opening measurement and fit assessmentOften credited toward the installation if booked together | $150 – $220 | Often credited toward the installation if booked together |
| Gas insert with correctly sized linerIncludes appliance, liner, and basic surround | $3,500 – $6,500 | Includes appliance, liner, and basic surround |
| Wood-burning insert with insulated linerHigher end for larger fireboxes and full-length insulated liners | $4,000 – $7,500 | Higher end for larger fireboxes and full-length insulated liners |
| Electric insert installationNo liner needed; cost driven by surround and finishing | $1,000 – $2,800 | No liner needed; cost driven by surround and finishing |
| Liner replacement only, existing insertFor correcting an undersized or damaged liner on a prior installation | $1,200 – $2,800 | For correcting an undersized or damaged liner on a prior installation |
| Custom surround panel fittingVaries with material choice and opening irregularity | $400 – $1,200 | Varies with material choice and opening irregularity |
Ranges are estimates for planning only, not quotes. Final pricing depends on what we find on site, access, and the condition of the existing system.
What moves the price
- Fuel type selected: gas, wood, or electric
- Chimney height, which determines liner length and material used
- Whether the existing firebox needs repair before insert installation
- Custom surround panel fitting for irregular masonry openings
- Whether an existing but undersized liner needs replacement
- Access difficulty for running the liner to the chimney top
Want a number for your own fireplace? Send us the details and we will come back with an estimate, or call (833) 949-4153.
How the work goes, step by step
- 1
Opening and flue measurement
We measure the masonry opening and flue dimensions precisely, since insert models vary in footprint and not every unit fits every fireplace without modification.
- 2
Firebox condition check
The existing masonry firebox is assessed for hidden deterioration, since installing an insert over damaged masonry does not resolve the underlying issue, only conceals it.
- 3
Liner sizing and installation
A liner correctly sized to the insert's flue outlet is run from the connection point to the top of the chimney and insulated where required for the fuel type.
- 4
Insert setting and connection
The insert is set into the opening, connected to the liner, and sealed according to its manufacturer specifications, with gas connections completed by a licensed technician.
- 5
Surround panel fitting
Trim and surround panels are fitted to close any gap between the insert and the original masonry opening for a finished, sealed appearance.
- 6
Commissioning and handover
The insert is tested for proper draft, heat output and operation, and you receive documentation of the liner specification and appliance model for your records.
How long it takes: Most insert installations, including liner installation, are completed in one to two days depending on chimney height and access.
Looking after it afterwards
- Have gas inserts serviced annually to maintain expected performance
- Sweep wood-burning inserts and their liners at least once a year
- Keep installation and liner documentation for future resale or insurance needs
- Monitor for any change in draft or unusual smell as an early warning sign
- Avoid blocking the insert's air intake or exhaust vents with furniture or decor
Mistakes we see most often
- Connecting an insert to the existing oversized flue without a proper liner
- Choosing an insert based on style before confirming it physically fits the opening
- Installing an insert over a deteriorated firebox without addressing it first
- Skipping liner insulation on a wood-burning insert installation
- Not keeping documentation of liner sizing for future resale purposes
Questions homeowners ask
- Can any insert go in any fireplace?
- No. Depth, width, height and flue size all limit the options, which is why we measure before recommending models.
- Does an insert need its own liner?
- Yes, for gas and wood. Sharing an oversized masonry flue causes condensation, poor draft and premature masonry damage.
- Why do I need a new liner if the chimney already has a flue?
- The existing flue is sized for an open fireplace and is far larger than a sealed insert needs. Connecting directly to it causes gases to cool too fast, leading to condensation and creosote buildup, so a correctly sized liner matched to the insert is required.
- Can I install any insert into any fireplace?
- No, opening depth, width, height and flue diameter all limit which models fit. We measure your specific opening before recommending a unit rather than assuming a standard size will work.
- Will an insert actually make the room warmer than an open fireplace?
- Yes, considerably. A sealed insert with a correctly sized liner controls combustion air and directs far more of the generated heat into the room instead of losing most of it up an oversized flue as an open fireplace does.
- Do electric inserts need a liner?
- No, electric inserts need no venting or liner at all, only a power connection, which makes them the simplest retrofit option though they provide less heat output than gas or wood alternatives.
- How do I know if my existing insert has liner problems?
- Signs include poor heat output despite the appliance seeming to run fine, a smell of unburned gas or smoke, or visible condensation staining near the top of the chimney. A camera inspection of the liner confirms whether it is undersized or damaged.
- Does an insert installation need a permit?
- Gas insert installations generally require a permit and must be completed by a licensed gas technician. Wood and electric inserts have different requirements depending on your municipality, which we confirm before starting work.
- Should I get an insert with a blower?
- For most rooms, yes, since a blower meaningfully increases how far heat travels from the insert rather than staying concentrated near the opening. It matters most in larger or open-concept spaces and less in smaller, more enclosed rooms.
- What if my existing masonry opening is slightly the wrong size for the insert I want?
- Minor masonry modification to widen an opening is sometimes possible, though it adds cost and time. We confirm actual opening dimensions against the insert's specifications before ordering so this is known upfront rather than discovered mid-installation.
Nearby
Other Communities Near St. Marys
Related work
Often Booked Together
Fireplace Repair in St. Marys
Diagnosis and repair of fireboxes, dampers, doors, screens and hearth components.
Fireplace Installation in St. Marys
New fireplace installation with correct venting, clearances and finished surround.
Glass Doors in St. Marys
Custom-fitted glass doors that reduce heat loss and keep sparks in the firebox.
Mantel Installation in St. Marys
Mantel and surround installation with clearances that satisfy the appliance listing.