
Ontario Fireplace & Chimney Specialists
Dryer Vent Repair in Dryden
Plenty of dryer ducts were never installed correctly in the first place.
Every job starts with a proper look at your system — not a guess over the phone. You get a written quote before any work begins, a clear explanation of what we found, and a technician who works to manufacturer and code requirements from start to finish.
- Written quotes, no surprise charges
- Photo-backed findings after every visit
- Work performed to code and manufacturer specs
- Serving Dryden and Kenora District, year-round
Dryer Vent Repair for Dryden homes
Dryden's housing runs from mid-century to newer builds, with wood and pellet appliances widely used through a heating season that runs most of the year.
Long burn seasons mean real creosote accumulation, and appliances used this hard benefit from a sweep and camera check before each winter rather than after a problem.
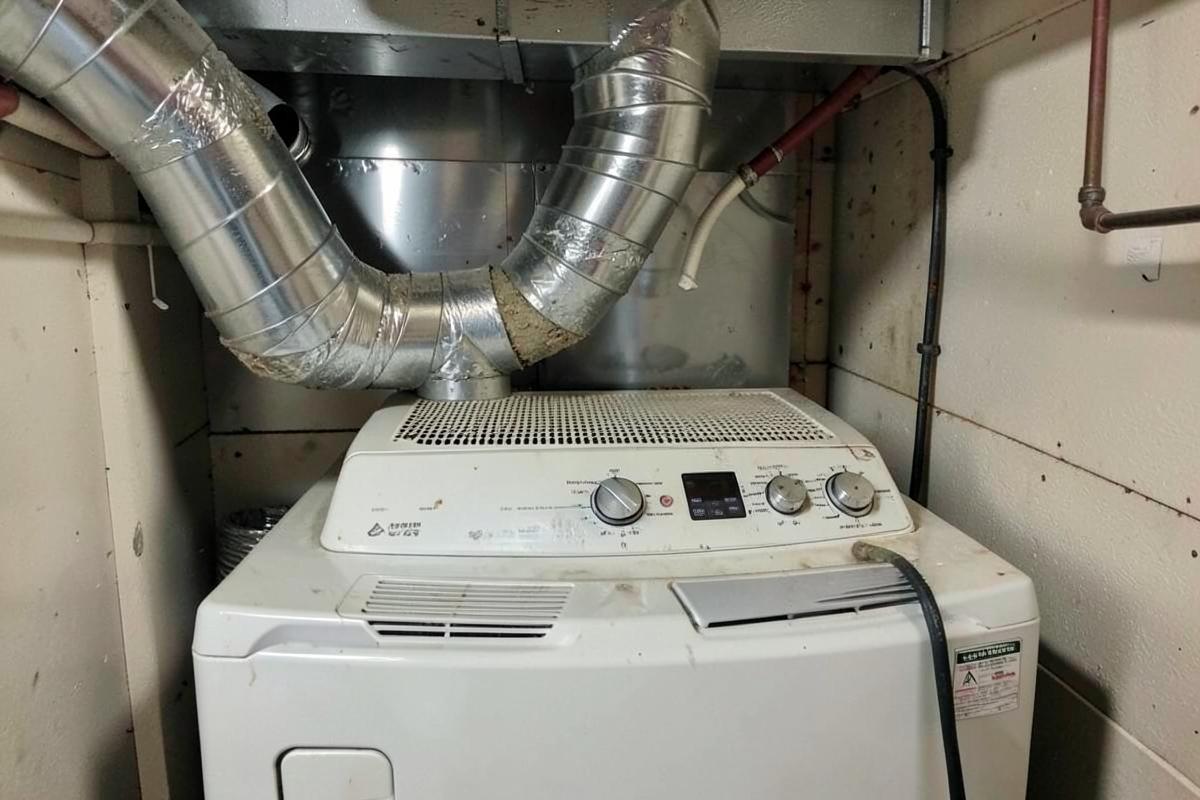
We regularly find ducts venting into a crawlspace or attic, foil hose crushed flat behind the appliance, runs far longer than the appliance allows, and terminations screened with mesh that lint packs solid within weeks.
Repair means shortening or rerouting the run, replacing failed material with rigid metal, sealing joints with foil tape instead of screws that catch lint, and fitting a proper louvered termination with no mesh.
What the visit includes
- Full duct route survey and length calculation
- Rigid metal duct replacement and rerouting
- Foil-taped joints with no protruding fasteners
- Correct exterior termination without mesh screen
- Airflow verification after the repair
Signs you need this
- The duct is disconnected or venting indoors
- Damp, humid or lint-dusted laundry room
- Visible crushed or kinked ducting
- A run with many elbows or excessive length
Areas we cover around Dryden
Vermilion Bay · Eagle River · Oxdrift · Wabigoon · Ignace
Not every dryer venting problem can be solved with a cleaning. Crushed or kinked sections of flexible duct, disconnected joints hidden behind a machine, a damaged or missing exterior hood, and ducts that were routed incorrectly from the start all require actual repair or replacement rather than simply clearing lint out of an otherwise sound system. These issues are common enough in Ontario homes that a vent cleaning visit frequently turns into a conversation about repair once the duct is fully accessed and inspected.
A lot of these problems trace back to how dryers get installed or moved during a renovation or a simple appliance swap: a duct pushed back into place after moving a dryer for cleaning or floor work can end up kinked behind the machine where nobody sees it, and a duct connection that was never properly clamped can work itself loose over months of vibration from normal dryer operation. Because the duct runs mostly out of sight, behind the machine, inside a wall cavity, or up through a ceiling, these problems often go unnoticed until a symptom like poor drying performance or a lint smell prompts someone to look.
This page covers how the more common venting defects are identified, what repair typically involves for each, and how repair pricing compares with straightforward cleaning for households trying to understand which service they actually need.
Crushed and kinked duct sections
Flexible foil or vinyl ducting is particularly prone to crushing when a dryer is pushed back against a wall without enough clearance, or when the duct gets pinched during an appliance swap and nobody notices before the new dryer is shoved fully into place. A crushed section can reduce the duct's effective diameter dramatically at that one point, which restricts airflow across the entire run regardless of how clean the rest of the duct is.
Repair generally means replacing the crushed section entirely rather than trying to reshape it back into a round profile, since flexible ducting that has been badly crushed rarely returns to its original shape reliably and tends to re-kink at the same point once the dryer is pushed back into position. Where clearance behind the dryer is genuinely tight, switching to a low-profile rigid duct transition designed for close-clearance installations solves the underlying problem rather than just replacing like-for-like and inviting the same crush to happen again.
Disconnected or loose joints
Duct joints secured with foil tape alone, rather than mechanical clamps, are prone to working loose over time as the dryer's vibration during normal operation gradually degrades the tape's adhesive bond, particularly in a duct routed through a warm, humid space. A loose joint allows hot, moist air and lint to escape into the wall cavity or floor joist space it passes through rather than reaching the exterior, which is both an efficiency loss and, over time, a moisture and lint accumulation risk inside a concealed space that is difficult to inspect.
Repairing a disconnected joint properly means resealing with UL-listed foil tape rated for dryer duct use, or better, replacing the connection with a mechanical clamp system that does not rely on adhesive bond strength holding over years of vibration and heat cycling. Any joint found disconnected during a repair visit should prompt a check of every other joint along the same run, since one failed connection often means the others were installed the same way and are at similar risk.
- Foil tape alone degrades over time under vibration and heat
- Mechanical clamps hold more reliably than tape-only connections
- One failed joint often signals others were installed the same way
- Concealed joints inside walls or floors are hardest to inspect casually
Damaged or missing exterior termination hoods
The exterior hood, with its hinged flap or set of louvers, protects the duct opening from weather and pests while still allowing exhaust air to push the flap open during operation. A hood that has cracked from age and sun exposure, been damaged by a falling branch or ladder contact, or simply gone missing entirely leaves the duct opening exposed, inviting rain, snow, insects and small animals into the ductwork, none of which improve airflow or safety.
Replacement hoods should be sized correctly to the duct diameter and made from a durable exterior-rated material, with the flap or louver mechanism moving freely once installed; a common mistake during a rushed replacement is installing a hood sized loosely to fit whatever was on hand, which then does not seal or swing properly against the duct opening.
Incorrect original routing and material choices
Some venting problems are not the result of damage at all but of how the system was installed originally, sometimes decades ago under different practices than are recommended today. Ducts routed with unnecessarily long horizontal runs when a shorter path to a different exterior wall was available, ducts using plastic accordion-style ducting throughout instead of rigid metal, or ducts with more than the generally recommended number of bends for the given length all represent installation choices that make ongoing performance and safety harder to maintain regardless of how well they are cleaned.
Correcting these issues means an actual reroute or full material replacement rather than a targeted repair of one bad section, and while this is a larger and more disruptive project than fixing a single crushed section or loose joint, it addresses a root cause that would otherwise keep generating recurring performance complaints no matter how often the duct gets cleaned.
Diagnosing which repair a given symptom points to
A dryer that runs its full cycle but leaves clothes still noticeably damp often points to airflow restriction from either a crushed section or heavy lint buildup, and distinguishing between the two usually requires visually accessing the duct rather than guessing from symptoms alone. A musty or lint smell noticed specifically in a nearby closet, wall or ceiling area, rather than in the laundry room itself, often points to a disconnected joint venting exhaust air into a concealed space rather than outside.
A dryer that seems to run fine but where the exterior hood flap barely moves or does not move at all during operation could indicate either a fully restricted duct upstream or a damaged, stuck hood at the termination itself, and checking the hood directly is a faster way to narrow that down than inspecting the entire duct length first.
Repair versus full duct replacement
A single identified defect, one crushed section, one loose joint, a damaged hood, can usually be repaired in isolation without touching the rest of a duct run that is otherwise sound and correctly installed. Where an inspection finds multiple issues along the same run, old brittle flexible ducting throughout, several loose joints, and a damaged hood all at once, full replacement of the run with new rigid ducting and a proper termination hood is often more cost-effective than repairing each defect piecemeal, since it resolves everything at once and starts the system fresh.
The decision between targeted repair and full replacement should follow from what the inspection actually finds rather than a default assumption either way, and a homeowner should expect a clear explanation of why a given repair scope was recommended over the alternative.
Coordinating repair with appliance moves or renovations
Any time a dryer is being relocated as part of a kitchen or basement renovation, or an appliance swap involves moving the machine even a few feet from its original position, the venting run should be reassessed rather than simply extended or patched to reach the new location. A duct patched together from mismatched sections to reach a relocated dryer is a common source of the crushed sections, loose joints and excessive bend counts discussed above.
Planning venting alongside the renovation, rather than as an afterthought once the new laundry space layout is finalized, generally produces a shorter, more direct run and avoids the compromises that come from routing ductwork around finished walls or cabinetry installed without the vent path in mind.
Dryer Vent Repair cost in Dryden
A single targeted repair, such as a crushed section or loose joint, typically costs $120 to $280, while a full duct upgrade or reroute generally runs $500 to $1,200.
| Work | Typical range | What moves the price |
|---|---|---|
| Crushed or kinked section replacement, accessible locationsingle section replacement behind or near the dryer | $150 – $280 | single section replacement behind or near the dryer |
| Loose or disconnected joint repairresealing or reclamping one or more joints along the run | $120 – $220 | resealing or reclamping one or more joints along the run |
| Exterior termination hood replacementincludes correctly sized hood and flap mechanism | $130 – $250 | includes correctly sized hood and flap mechanism |
| Rigid duct upgrade replacing flexible ductingfull-run material swap for improved airflow and reduced fire risk | $300 – $700 | full-run material swap for improved airflow and reduced fire risk |
| Full duct reroute for improved pathshorter or straighter run planned to a different exterior wall | $500 – $1,400 | shorter or straighter run planned to a different exterior wall |
| Combined repair after inspection finds multiple defectsaddresses several issues found along the same run in one visit | $450 – $1,000 | addresses several issues found along the same run in one visit |
Ranges are estimates for planning only, not quotes. Final pricing depends on what we find on site, access, and the condition of the existing system.
What moves the price
- Whether the issue is a single defect or multiple problems found along the same run
- Accessibility of the affected section, including whether wall or floor access is needed
- Material used for replacement, rigid metal versus flexible ducting
- Whether a full reroute is chosen over patching the existing path
- Coordination with an ongoing renovation or appliance relocation
- Exterior hood replacement needs alongside interior duct repair
Want a number for your own fireplace? Send us the details and we will come back with an estimate, or call (833) 949-4153.
How the work goes, step by step
- 1
Diagnose the specific defect
The duct is inspected end to end, or the symptom is used to narrow down likely problem areas, to identify exactly what needs repair.
- 2
Determine repair versus replacement scope
Findings determine whether a targeted fix is sufficient or whether multiple issues warrant full duct replacement instead.
- 3
Access the affected section
The dryer is moved, or wall or floor access is opened where needed, to reach the specific section requiring repair.
- 4
Replace or reseal the defective component
Crushed sections are replaced, loose joints are reclamped or resealed, or a damaged hood is swapped for a correctly sized replacement.
- 5
Reassemble and secure the run
All connections are checked for secure clamping along the repaired section and the surrounding duct run.
- 6
Test airflow and hood movement
The dryer is run briefly to confirm improved airflow and proper flap or louver movement at the exterior termination.
How long it takes: A single targeted repair typically takes thirty minutes to an hour; a full duct reroute or rigid duct upgrade generally takes half a day depending on run length and access.
Looking after it afterwards
- Leave adequate clearance behind the dryer after any repair to prevent re-crushing a flexible section
- Check the exterior hood periodically to confirm the flap continues moving freely
- Schedule a follow-up cleaning on the normal annual schedule even after a repair is completed
- Reassess the venting path any time the dryer is moved or a renovation changes the laundry space
- Watch for a return of prior symptoms, which could indicate the underlying cause was not fully resolved
Mistakes we see most often
- Pushing a repaired flexible duct back into the same tight clearance that caused the original crush
- Resealing a loose joint with foil tape alone instead of a mechanical clamp
- Patching individual defects repeatedly instead of considering a full upgrade when several issues appear at once
- Extending an existing duct with mismatched sections to reach a relocated dryer
- Leaving an exterior hood replacement mismatched in size to the duct diameter
Questions homeowners ask
- Can a dryer vent into the attic?
- No. That dumps warm moist air into the structure and causes mould and frost damage. It has to terminate outdoors.
- Why remove the mesh from the vent hood?
- Mesh catches lint rather than pests and blocks quickly. A louvered flap keeps animals out without restricting the airflow.
- How can a homeowner tell if a duct needs repair rather than just cleaning?
- Symptoms like a lint or musty smell noticed away from the laundry room, a hood flap that does not move at all during operation, or drying performance that does not improve after a recent cleaning all suggest a structural issue such as a crushed section or disconnected joint rather than simple lint buildup.
- Is foil tape an acceptable way to seal dryer duct joints?
- Foil tape rated for dryer duct use can work as a temporary or supplementary seal, but it tends to degrade under the vibration and heat cycling a duct experiences over years of use, so a mechanical clamp connection is generally the more durable and reliable long-term solution.
- Why does the duct behind my dryer keep getting crushed?
- Insufficient clearance between the dryer and the wall is the most common cause, and repeatedly replacing a crushed flexible section without addressing that clearance issue, either by adjusting dryer placement or switching to a low-profile rigid transition, usually just leads to the same problem recurring.
- When does it make sense to fully replace a duct run instead of repairing individual issues?
- When an inspection finds multiple problems along the same run, several loose joints, old brittle flexible ducting, a damaged hood, replacing the entire run at once is often more cost-effective and produces a more reliable result than repairing each issue separately over multiple visits.
- Does moving a dryer during a renovation always require new venting?
- Not always, but any relocation should prompt a reassessment of the venting path rather than simply extending the existing duct to reach the new position, since patched-together extensions are a common source of crushed sections, loose joints and excessive bend counts.
- Can a damaged exterior hood be replaced without touching the interior duct?
- Yes, a hood replacement is generally an isolated repair at the termination point and does not require accessing the interior duct run unless an inspection at the same visit identifies additional issues further along the ductwork.
Nearby
Other Communities Near Dryden
Related work
Often Booked Together
Dryer Vent Cleaning in Dryden
Full-length lint removal from dryer ducting, with airflow testing at the termination.
Air Duct Cleaning in Dryden
Supply and return duct cleaning with negative-air containment and before-and-after photos.
Chimney Fan in Dryden
Mechanical draft fans for chimneys that cannot draft adequately on their own.
Chimney Sweeping in Dryden
Full mechanical sweep of the flue, smoke chamber and firebox with containment and photos.