
Ontario Fireplace & Chimney Specialists
Chimney Tuckpointing in Stratford
Mortar is meant to be the sacrificial part — replace it before the brick goes.
Every job starts with a proper look at your system — not a guess over the phone. You get a written quote before any work begins, a clear explanation of what we found, and a technician who works to manufacturer and code requirements from start to finish.
- Written quotes, no surprise charges
- Photo-backed findings after every visit
- Work performed to code and manufacturer specs
- Serving Stratford and Perth County, year-round
Tuckpointing for Stratford homes
Stratford's celebrated older neighbourhoods carry tall brick chimneys, frequently serving converted gas appliances through flues that were sized for coal.
Oversized flues cause condensation that damages liners from the inside out, so sizing verification and relining recommendations are central to our work in this city.
Mortar is deliberately softer than brick so that movement and salt damage show up in the joint rather than the masonry unit. When the joints are eroded past about a centimetre, water reaches deeper into the wall and the brick starts taking the damage instead.
Repointing is only as good as the mix. Modern high-strength mortar on soft older brick causes spalling because the brick becomes the weakest element. We match strength, sand colour and joint profile so the repair works with the existing masonry rather than against it.
What the visit includes
- Joint depth and mortar hardness assessment
- Grinding out failed joints to a sound depth
- Mortar matched in strength, colour and sand
- Tooling to match the original joint profile
- Cleandown and debris removal
Signs you need this
- Mortar you can dig out with a screwdriver
- Joints recessed noticeably behind the brick face
- Sand collecting at the base of the chimney
- Loose bricks that rock under hand pressure
Areas we cover around Stratford
St. Marys · Shakespeare · Sebringville · Tavistock · Gadshill
Mortar is designed to be the sacrificial part of a masonry chimney. It is intentionally softer than the brick or stone it holds together, which sounds counterintuitive until you understand why: mortar is meant to absorb the stresses of movement, moisture, and freeze-thaw cycling so that the brick units themselves do not have to. Over enough years, that sacrificial role means mortar joints eventually wear down, crumble, and need to be replaced, while the surrounding brick, if it was reasonably good quality to begin with, often remains sound for far longer.
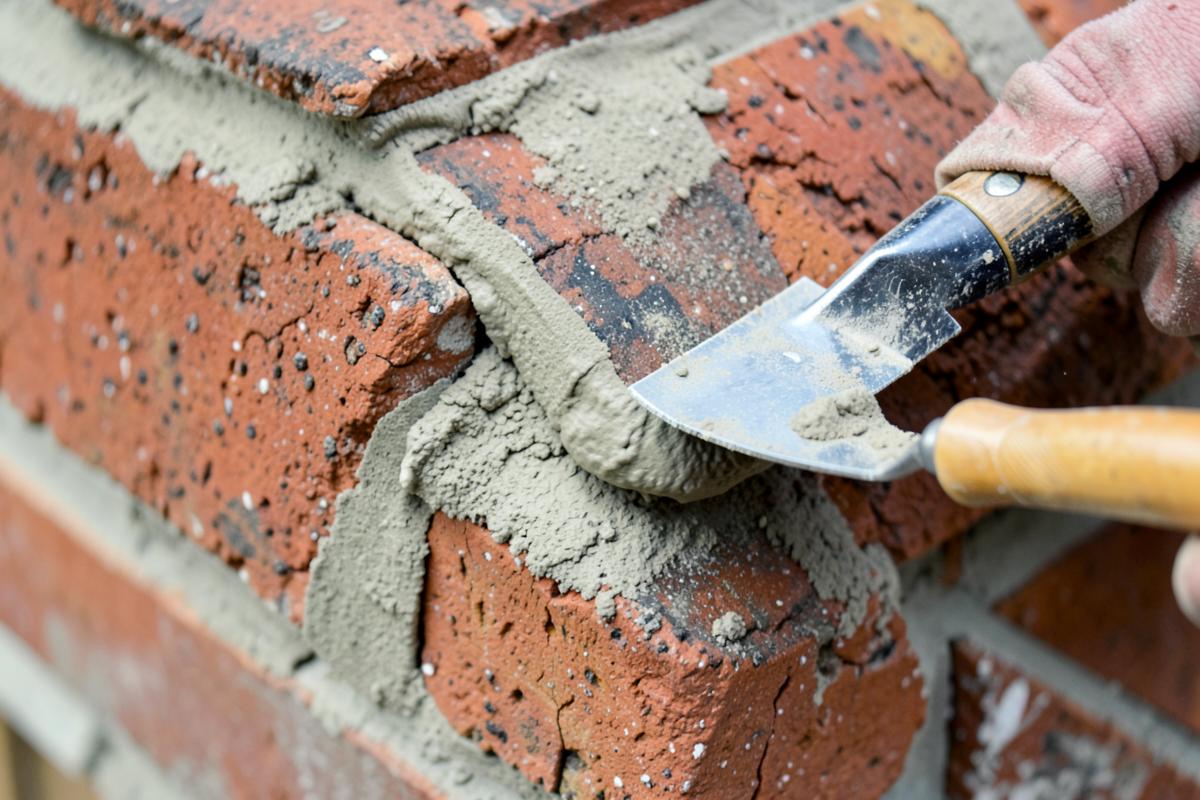
Tuckpointing, more precisely called repointing in most technical usage though the terms are used interchangeably in everyday conversation, is the process of grinding out deteriorated mortar to a consistent depth and replacing it with fresh mortar matched to the original in composition, colour, and joint profile. Done correctly, it restores both the structural integrity of the chimney and its water-shedding ability, since failed mortar joints are one of the most direct paths for water to get deep into a chimney's structure.
This is not a cosmetic patch job, though a well-done repointing job does also restore a chimney's appearance considerably. The mortar mix matters, the depth of removal matters, and matching the new mortar's hardness to the surrounding brick matters just as much as any visual consideration, because using the wrong mortar can actually damage historic or softer brick permanently.
Why mortar fails before the brick does
Mortar is a mixture of sand, lime or cement, and water, formulated specifically to be softer and more porous than the brick it bonds. This is deliberate: mortar is meant to crack and erode under stress rather than transferring that stress into the brick itself, and it is also meant to absorb and release moisture more readily than brick, acting as a kind of pressure-relief valve for water movement within the wall.
That sacrificial role means normal weathering, freeze-thaw cycling, and simple age gradually erode mortar joints even on a well-built chimney. Joints exposed to the most direct weather, typically the top few courses of brick closest to the crown and the side of the chimney facing prevailing wind and rain, tend to fail first and most visibly, which is why deterioration on a chimney often looks worse near the top than lower down the stack.
Once mortar has eroded back far enough, usually a quarter inch or more of recession from the brick face, it stops doing its job of shedding water and starts doing the opposite, creating small ledges and gaps where water collects and penetrates more easily than it would through a sound joint. This is the point at which repointing shifts from a maintenance recommendation to an active repair need.
The repointing process, step by step
The process begins with grinding out the failed mortar to a consistent depth, generally at least three-quarters of an inch to two and a half times the joint width, using a grinder with a diamond blade sized to fit within the joint without cutting into the adjacent brick edges. This depth matters because a shallow repoint, sometimes done as a quick cosmetic fix, will not bond well and tends to fail again within a few years.
After grinding, the joints are cleaned of dust and debris, often with compressed air or a wire brush, and dampened slightly to control how quickly the new mortar cures, since mortar that dries too fast from moisture being pulled out by dry surrounding brick does not develop full strength. New mortar is then packed into the joint in thin layers, called lifts, rather than all at once, allowing each layer to set up before the next is added.
Once the mortar has reached the right degree of firmness, typically checked by thumb pressure, the joint is tooled to match the original profile, whether that is a concave, flush, or struck joint, which affects both appearance and how well the finished joint sheds water going forward.
- Grinding out failed mortar to consistent depth without damaging brick edges
- Cleaning and dampening joints before new mortar is applied
- Packing new mortar in thin lifts rather than a single deep fill
- Tooling the joint profile to match the original chimney's appearance
- Curing period with protection from rapid drying or freezing
Why mortar mix and hardness matter so much
Using mortar that is harder than the surrounding brick is one of the more damaging mistakes possible in a repointing job, and it is unfortunately common when modern high-strength cement-based mortars are used on older masonry without checking compatibility first. If the mortar is harder than the brick, the brick becomes the material forced to absorb stress and moisture cycling instead, and since brick was never designed for that sacrificial role, it begins to crack and spall instead of the mortar joint doing so.
This is a particular concern on older Ontario homes, often built with softer, more porous brick and lime-based mortars, where a modern portland-cement-heavy mix is significantly harder than what the wall was originally built with. A proper repointing job matches mortar composition, generally the ratio of lime to cement to sand, to the age, hardness, and porosity of the specific brick being worked on rather than defaulting to a single standard mix for every job.
Colour matching also matters for anyone concerned about appearance, particularly on a visible chimney facing the street, and sand colour and mortar additive choices can be adjusted to blend reasonably well with existing joints rather than creating an obvious patchwork appearance.
Weather windows for repointing in Ontario
Mortar needs a period of moderate temperature, generally staying above freezing, to cure properly, since water within the mortar mix will not hydrate the cement and lime correctly if it freezes before curing has progressed far enough. This effectively limits repointing work in Ontario to a season running roughly from late spring through early fall, with some flexibility depending on that year's specific weather pattern.
Extremely hot, dry conditions present a different challenge, since mortar that dries too quickly from sun and heat before it has cured properly ends up weaker and more prone to future cracking, which is why repointing work is often scheduled for cooler parts of the day during summer months and sometimes protected with damp coverings during the initial curing period.
Assessing how much of a chimney actually needs repointing
Mortar deterioration is rarely uniform across an entire chimney, and a proper assessment identifies which specific courses and faces need work rather than assuming the whole structure requires full repointing. It is common to find the top several courses and the weather-facing side in significantly worse condition than the rest of the stack, which allows for a more targeted, less costly repair scope.
That said, deterioration that has progressed to loose or missing brick, visible daylight through joints, or significant structural movement usually indicates the problem extends further than what is immediately visible from the ground, and a hands-on inspection from a ladder or lift is often needed to give an accurate scope before quoting the work.
Repointing versus full rebuild
Repointing addresses mortar joint failure, but it does not fix bricks that are themselves cracked, spalled, or structurally compromised. When brick deterioration has progressed significantly, particularly where multiple bricks have lost their face or become soft enough to crumble under light pressure, a partial or full rebuild of the affected section becomes the more appropriate repair rather than repointing around brick that will continue to fail regardless of the mortar condition.
A general guideline used in the trade is that if roughly a quarter or more of the visible brick faces are significantly damaged, rebuilding that section is usually more cost-effective and longer-lasting than trying to repoint around failing brick. This is a judgment call best made after a hands-on inspection rather than estimated from ground level, since brick condition can look worse or better than it actually is depending on lighting and viewing angle.
Structural, insurance, and resale considerations
Deteriorated mortar is not just a cosmetic or water-intrusion issue; in advanced cases it compromises the structural integrity of the chimney stack itself, since mortar joints are what hold individual brick units together as a load-bearing unit. A chimney with severely eroded mortar can develop leaning, bulging, or in extreme cases partial collapse, which is a genuine safety hazard rather than a purely aesthetic concern.
As with other masonry deterioration, mortar failure is typically viewed by insurers as a gradual maintenance issue rather than a suddenly occurring covered event, making proactive repointing a cost worth budgeting for as a homeowner rather than expecting insurance to address later. At resale, visibly deteriorated mortar joints are one of the more commonly flagged chimney issues on a home inspection report, and addressing it ahead of a sale generally costs less and creates less friction than negotiating around it during a transaction.
Chimney Tuckpointing cost in Stratford
A typical single-storey chimney repointing job in Ontario averages around $1,400 to $1,600 once access, mortar matching, and joint condition are all factored in.
| Work | Typical range | What moves the price |
|---|---|---|
| Spot repointing, top courses onlytargeted repair of the most weather-exposed joints | $450 – $750 | targeted repair of the most weather-exposed joints |
| Full chimney repointing, single-storeyall visible mortar joints ground out and replaced | $1,100 – $1,900 | all visible mortar joints ground out and replaced |
| Full chimney repointing, two-storey or talleradditional access equipment required | $1,600 – $2,800 | additional access equipment required |
| Partial brick rebuild alongside repointingper affected section, depending on extent | $800 – $1,800 | per affected section, depending on extent |
| Historic or lime-mortar-matched repointingcustom mortar mix for heritage brick | $1,600 – $3,200 | custom mortar mix for heritage brick |
| Diagnostic assessment with lift or ladder accessoften credited toward the repair if proceeding | $180 – $350 | often credited toward the repair if proceeding |
Ranges are estimates for planning only, not quotes. Final pricing depends on what we find on site, access, and the condition of the existing system.
What moves the price
- Total area of mortar joints requiring grinding and replacement
- Chimney height and the access equipment required to reach it safely
- Whether mortar needs custom mixing to match older or lime-based original mortar
- Extent of any brick damage requiring partial rebuild alongside repointing
- Colour and joint-profile matching requirements for visible, street-facing chimneys
- Weather-driven scheduling constraints affecting how quickly work can be completed
Want a number for your own fireplace? Send us the details and we will come back with an estimate, or call (833) 949-4153.
How the work goes, step by step
- 1
Hands-on condition assessment
From a ladder or lift, we examine mortar joint depth, brick condition, and identify which courses and faces have deteriorated enough to need repointing versus those still sound.
- 2
Mortar analysis and matching
We assess the original mortar's composition and hardness, particularly on older homes, to formulate a compatible replacement mix rather than defaulting to a standard modern blend.
- 3
Grinding out failed joints
Deteriorated mortar is ground out to a consistent depth using a diamond blade sized to avoid damaging the surrounding brick edges.
- 4
Joint preparation
Ground joints are cleaned of dust and debris and dampened slightly to control curing speed before any new mortar is applied.
- 5
Repointing in lifts
New mortar is packed into the joints in thin layers, allowing each to firm up before the next is added, which produces a stronger and longer-lasting bond than a single deep fill.
- 6
Tooling and curing
Finished joints are tooled to match the original profile, then protected from rapid drying or unexpected temperature drops during the curing period.
How long it takes: Full chimney repointing typically takes one to three days depending on chimney size and height, with weather-dependent curing time afterward before the surface can be considered fully set.
Looking after it afterwards
- Avoid pressure-washing newly repointed masonry for at least a few weeks while curing continues
- Have the chimney checked periodically for early signs of new mortar erosion, particularly on weather-facing joints
- Keep an eye on the same top courses that failed previously, since they remain the most exposed
- Address any water intrusion sources, like a damaged crown or cap, that may have contributed to the original mortar failure
- Avoid painting over newly repointed brick, which can trap moisture and undermine the repair
Mistakes we see most often
- Using a modern high-strength mortar mix on older, softer brick without checking compatibility
- Repointing with too shallow a grind depth, resulting in a cosmetic patch that fails again quickly
- Ignoring already-damaged brick and repointing around it rather than addressing the underlying rebuild need
- Scheduling repointing work too late in the fall, risking improper curing before freezing temperatures arrive
- Skipping colour and profile matching, resulting in a visually patchy repair on a prominent chimney
Questions homeowners ask
- How long does tuckpointing last?
- A correctly matched repoint on sound brick commonly lasts decades. A mismatched mix can fail within a few winters, which is why the mortar specification matters more than the labour rate.
- Do you need to repoint the whole chimney?
- Not always. Weather-facing sides and the above-roof section usually deteriorate first and can be done on their own.
- How do I know if my chimney needs repointing versus just cleaning?
- Mortar that is crumbling, receded more than about a quarter inch from the brick face, or missing entirely in sections needs repointing. Surface dirt or staining without actual material loss is a cleaning issue rather than a structural mortar problem, and a hands-on inspection can distinguish between the two.
- Why can't I just use any mortar mix from a hardware store?
- Off-the-shelf mortar is often formulated harder than what older brick and original lime-based mortars were designed to work with, and using a mismatched mix can force stress onto the brick itself, causing it to crack or spall over time instead of the mortar.
- Will repointing make my chimney look patchy compared to the rest of the brick?
- It does not have to. Matching mortar colour and joint profile to the existing work is a normal part of a proper repointing job, and while some colour variation is common right after the work due to curing, a well-matched repointing job blends in reasonably well once fully cured.
- How long does a repointing job typically last before needing to be redone?
- Well-executed repointing with properly matched mortar commonly lasts several decades, though the specific lifespan depends on weather exposure, mortar composition, and how well other water-management components like the crown and cap are maintained.
- Can repointing be done in winter if it is urgent?
- It is not recommended, since mortar needs temperatures above freezing to cure properly, and curing in cold weather typically results in weaker, more failure-prone joints. Urgent issues are sometimes temporarily stabilized until proper repointing conditions return in spring.
- Is repointing cheaper than a full chimney rebuild?
- Generally yes, since repointing addresses mortar joints only and preserves the existing brick, while a rebuild involves removing and replacing brick units entirely. Repointing is only appropriate when the brick itself remains structurally sound, which is why an accurate assessment matters before choosing between the two.
Nearby
Other Communities Near Stratford
Related work
Often Booked Together
Chimney Rebuild in Stratford
Partial or full rebuild of deteriorated masonry chimneys, from the roofline up or from the footing.
Crown Repair in Stratford
Crown resurfacing, rebuilding and sealing to stop water entering the masonry from above.
Waterproofing in Stratford
Vapour-permeable water repellent that keeps rain out while letting masonry dry.
Firebox Repair in Stratford
Rebuilding cracked firebrick, refractory panels and failed refractory mortar joints.