
Ontario Fireplace & Chimney Specialists
Chimney Liner Installation in Haliburton
The liner is what keeps combustion products out of your walls.
Every job starts with a proper look at your system — not a guess over the phone. You get a written quote before any work begins, a clear explanation of what we found, and a technician who works to manufacturer and code requirements from start to finish.
- Written quotes, no surprise charges
- Photo-backed findings after every visit
- Work performed to code and manufacturer specs
- Serving Haliburton and Haliburton County, year-round
Chimney Liner for Haliburton homes
Haliburton properties rely on wood almost universally: fieldstone fireplaces, freestanding stoves and inserts, many on tall chimneys running up the outside of the building.
Exterior chimneys run cooler and build creosote faster, so sweeping intervals here are shorter and camera checks are worth doing before each season.
Older Ontario chimneys were built with clay tile liners, and tiles crack when they are shocked by heat or shifted by settlement. A cracked liner lets flue gases contact framing and lets moisture into the masonry, which is why relining is one of the most common repairs on houses built before the 1980s.
Liner sizing matters as much as material. An oversized flue cools gases and condenses moisture; an undersized one restricts flow and spills gases into the room. We size to the appliance outlet and the flue height, insulate where clearance requires it, and finish with a proper top plate and cap.
What the visit includes
- Flue measurement and camera assessment
- Liner sizing calculation for the specific appliance
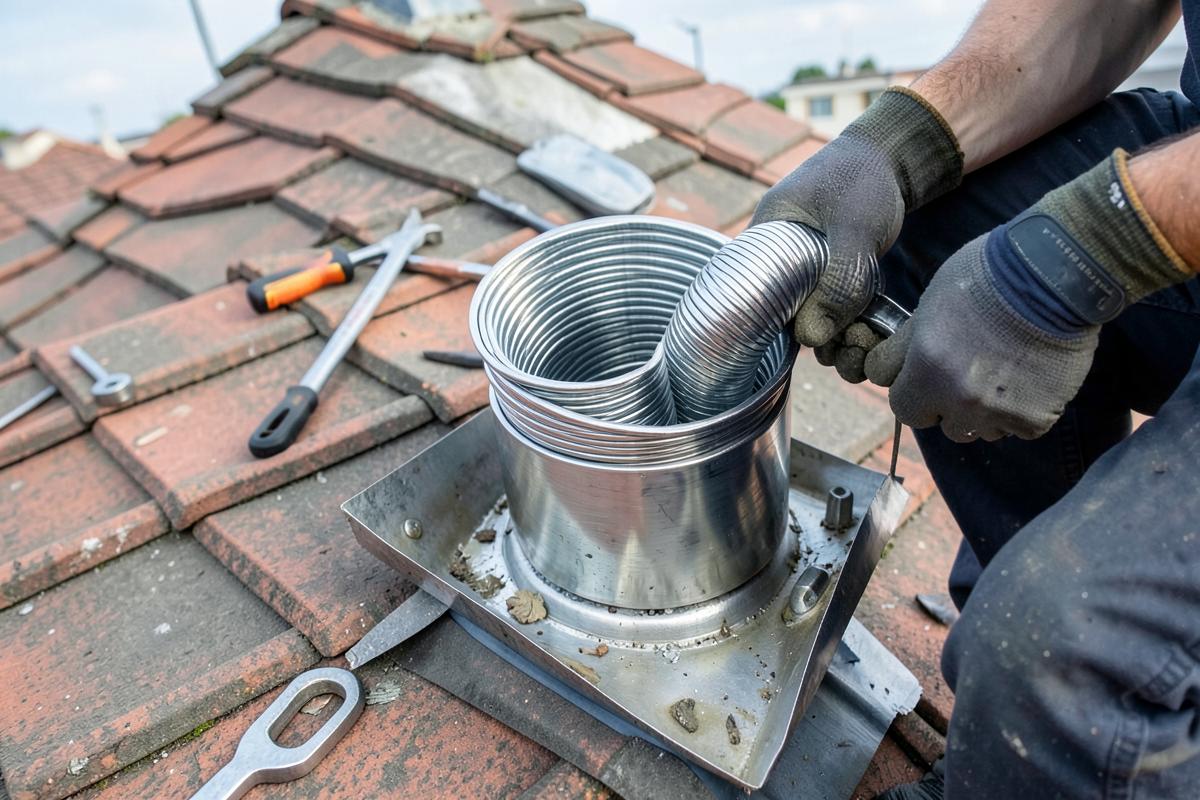
- Stainless steel flexible or rigid liner installation
- Insulation wrap or pour where clearances require it
- Top plate, storm collar and cap installation
Signs you need this
- Tile shards appearing in the firebox or cleanout
- A camera scan showing cracked or offset tiles
- Converting the fireplace to gas or adding a wood insert
- Staining on the chimney breast in an unused flue
Areas we cover around Haliburton
Minden · West Guilford · Eagle Lake · Carnarvon · Kinmount
The liner is the part of a chimney that actually does the dangerous work: containing combustion gases at high temperature and channelling them safely out of the house. Everything else about a chimney, the brick, the crown, the cap, exists largely to protect and support that liner, which makes liner condition arguably the single most important thing to get right in the whole system.
Clay tile liners, standard in most Ontario homes built through the mid-twentieth century and well beyond, are durable under normal conditions but brittle under thermal shock and structural movement. A chimney fire, a settling foundation, or simply decades of heating and cooling cycles can crack tile sections, and a cracked tile liner is one of the most common findings behind a decision to reline rather than continue using the existing flue as-is.
This page covers why liners fail, how sizing and material choice are decided for a specific appliance, what installation actually involves, and how relining decisions differ between wood, gas and oil-burning systems, since each fuel type puts very different demands on a liner.
Why clay tile liners crack
Clay flue tiles are fired ceramic sections stacked and mortared together up the flue. They handle sustained heat well but are vulnerable to rapid temperature swings, such as the intense heat spike of a chimney fire, which can crack a tile section that would otherwise last for decades under normal use. Structural movement, whether from foundation settlement or simple age-related shifting, can also crack joints between tile sections even without any fire event.
Once a tile cracks, the damage does not stay contained to that one section. Moisture and combustion byproducts find their way through the gap into the surrounding brick, and the constant thermal cycling around the crack tends to widen it over successive heating seasons rather than staying stable, which is why a small crack found during an inspection is worth addressing before it becomes a larger structural problem.
Why oversized and undersized flues both cause problems
A flue that is too large for the appliance connected to it cools flue gases too quickly as they travel up a wide, thermally massive passage, and cooled gases condense moisture and creosote on the liner walls at a much higher rate than a correctly sized flue would. This is an especially common issue when a large masonry flue, originally sized for an open wood fireplace, is later connected to a smaller, more efficient gas insert or wood stove without resizing the liner.
A flue that is too small for the appliance restricts flow, which can cause draft problems, spillage of combustion gases into the room, and unsafe operation of the connected appliance. Sizing is calculated from the specific appliance's outlet size, the appliance manufacturer's venting requirements, and the height and any offsets in the flue run, not simply matched to whatever flue happens to already be there.
- Oversized flues cool gases faster, increasing creosote and condensation
- Undersized flues restrict flow, risking spillage into the living space
- Sizing is calculated from the appliance's specific venting requirements
- Flue height and any offsets both factor into the sizing calculation
- Fuel-switching (wood to gas, for example) almost always requires resizing
Stainless steel liner types and grades
Flexible stainless steel liner is the most common relining product for existing masonry chimneys, since it can be fed down through the flue and around moderate offsets that a rigid liner cannot navigate. It comes in different wall thicknesses and steel grades suited to different fuels: a liner intended for oil or gas is typically a lighter grade than one intended for solid fuel, since wood burning produces more corrosive byproducts and higher peak temperatures over the liner's service life.
Rigid stainless liner sections, joined together as they are installed, offer a smoother interior surface with less resistance to flow than flexible liner's corrugated wall, and are used where the flue run is straight enough to allow it, typically in new construction or a full rebuild rather than retrofitting into an existing masonry flue with bends.
Cast-in-place liner systems, where a lightweight insulating masonry mixture is poured or pumped into the existing flue around a temporary form, are an alternative approach that also improves the structural integrity of the surrounding masonry, which stainless liner installation alone does not address.
Insulation and clearance requirements
Depending on the flue's proximity to combustible framing and the fuel being vented, a liner may need to be wrapped in an insulating blanket or have insulating material poured around it in the annular space between liner and flue wall. Insulation also helps keep flue gases warmer as they rise, which improves draft and reduces creosote condensation, particularly relevant for wood-burning installations in a climate with a long, cold heating season.
Clearance to combustibles at the point where a liner passes near ceiling joists, roof framing or nearby walls is a safety-critical detail that gets checked during sizing and installation, and insulated liner or a properly rated firestop can be what makes an installation compliant where an uninsulated liner would leave clearances too tight.
Termination and top components
A liner installation finishes at the top with a storm collar, sealing around the liner where it exits the flue tile or crown, and a top plate spanning the flue opening to support the liner's weight and close off the gap around it from weather and animal entry. A cap sized to the new liner diameter, not the old flue tile diameter, completes the installation.
Getting the top components right matters more than it might seem, since a poorly sealed storm collar or an ill-fitting top plate reintroduces exactly the water intrusion problem that relining was often undertaken to solve in the first place, just at the top of the new liner instead of through a cracked tile.
Fuel-specific relining considerations
Wood-burning relines prioritize a liner grade and diameter that supports strong draft and minimizes creosote formation, since wood produces the highest creosote load of the common residential fuels and the liner needs to handle sustained high temperatures during a hot burn as well as the cooler smoulder of an overnight load.
Gas appliance relines, particularly for gas inserts placed into an existing masonry fireplace, almost always require a liner because gas combustion produces significant water vapour that condenses inside an oversized, unlined masonry flue and attacks the mortar and brick from the inside. Direct-vent gas appliances have different venting requirements again, often not using the existing masonry flue at all but a dedicated smaller pipe run through it.
Oil-fired appliances require a liner rated for the specific corrosive byproducts of oil combustion, and oil systems are less commonly encountered in newer Ontario construction but still present in a meaningful share of older housing stock, particularly in rural areas.
Compliance and inspection after installation
Liner installation is one of the areas most directly tied to general code and manufacturer venting requirements, since correct sizing, clearance and termination all have defined technical requirements behind them even though those requirements are not a marketing credential to cite, just the basis for doing the work correctly. A completed installation is typically documented with photos of the sizing calculation, the installed liner, insulation where used, and the finished top components.
It is worth keeping that documentation with other chimney records, since it demonstrates the specific liner installed, its rated fuel type and diameter, which matters if the appliance is ever changed again or if the system needs future inspection.
Chimney Liner Installation cost in Haliburton
A standard stainless steel liner installation for a wood-burning fireplace in Ontario typically averages around $2,200 to $2,800 including insulation and top components.
| Work | Typical range | What moves the price |
|---|---|---|
| Flexible stainless liner, single-storey wood-burning fluetypical straightforward relining with moderate insulation | $1,800 – $2,900 | typical straightforward relining with moderate insulation |
| Flexible stainless liner, two-storey or offset flueextra length and complexity for offsets or taller runs | $2,600 – $4,200 | extra length and complexity for offsets or taller runs |
| Insulated liner package (wrap or pour-fill)added to base liner cost where clearance or performance requires it | $400 – $900 | added to base liner cost where clearance or performance requires it |
| Gas insert liner (smaller diameter rigid or flexible)sized specifically to the gas appliance being vented | $1,200 – $2,200 | sized specifically to the gas appliance being vented |
| Cast-in-place liner systemfull flue relining with masonry insulating mix, also restores structural integrity | $3,500 – $6,500 | full flue relining with masonry insulating mix, also restores structural integrity |
| Top plate, storm collar and cap packagefinishing components sized to the new liner diameter | $250 – $450 | finishing components sized to the new liner diameter |
Ranges are estimates for planning only, not quotes. Final pricing depends on what we find on site, access, and the condition of the existing system.
What moves the price
- Fuel type and required liner grade (wood, gas or oil)
- Flue height and number of offsets to navigate
- Whether insulation wrap or pour-fill is required for clearances
- Liner diameter needed for the specific appliance being vented
- Whether cast-in-place is chosen over flexible stainless for structural reasons
- Condition of the existing masonry affecting how the liner is supported
Want a number for your own fireplace? Send us the details and we will come back with an estimate, or call (833) 949-4153.
How the work goes, step by step
- 1
Measure and assess
The flue is measured for height, shape and any offsets, and a camera scan documents the existing liner condition before sizing the replacement.
- 2
Calculate sizing
Liner diameter and material grade are calculated from the specific appliance's outlet and manufacturer venting requirements rather than matched to the old flue tile size.
- 3
Remove or bypass old liner sections
Damaged tile sections are addressed as needed, either left in place with the new liner run through them or removed where clearance requires it.
- 4
Insulate the liner
An insulation wrap is fitted around the liner, or insulating fill is poured into the annular space, depending on the clearance requirement and fuel type.
- 5
Install and connect
The liner is fed down the flue from the top, connected to the appliance or damper at the bottom, and supported and sealed at the top.
- 6
Finish and test
A top plate, storm collar and correctly sized cap are installed, and the appliance connection is checked for a secure, sealed fit before the job is signed off.
How long it takes: A standard single-flue liner installation typically takes half a day to a full day; cast-in-place systems and complex offsets can take longer.
Looking after it afterwards
- Continue annual sweeping appropriate to the fuel type even with a new liner installed
- Have the liner and connections checked during each annual inspection
- Report any unusual smells or draft changes promptly, since they can indicate a connection issue
- Keep the liner sizing documentation on file if the appliance is ever changed later
- Avoid running an appliance not matched to the liner's rated fuel type
Mistakes we see most often
- Reusing an old, oversized flue for a new smaller or more efficient appliance without resizing
- Choosing liner diameter based on the old flue tile rather than the new appliance's requirements
- Skipping insulation where clearance to combustibles actually requires it
- Installing a liner without verifying it is rated for the fuel type in use
- Neglecting the top plate and storm collar, leaving the top of the liner exposed to water
Questions homeowners ask
- How long does a stainless liner last?
- Quality stainless liners are commonly warranted for decades when matched to the fuel. Wood, gas and oil each have different corrosion behaviour, so material grade is chosen for the fuel it will carry.
- Do I need a liner for a gas insert?
- In almost all cases yes, because a gas appliance vented into a large masonry flue condenses moisture that attacks the masonry from the inside.
- How long does a stainless steel liner last?
- Quality liners matched correctly to their fuel type are commonly warrantied for decades of service, though actual lifespan depends heavily on how the appliance is operated and how consistently the system is swept and inspected, since neglect shortens the effective life of any liner material.
- Do I need a new liner if I switch from wood to gas?
- In almost all cases, yes. A masonry flue sized for an open wood fireplace is typically far too large for a gas insert, and running gas combustion through an oversized, unlined flue leads to condensation damage inside the masonry that a correctly sized liner prevents.
- Can a cracked liner be repaired instead of replaced?
- A single small crack in an otherwise sound tile liner is sometimes addressed with a patch or partial relining of just the affected section, but widespread cracking or multiple damaged tiles usually makes a full reline more practical and more reliably safe than a patchwork approach.
- Is cast-in-place liner better than stainless steel liner?
- Neither is universally better; they suit different situations. Cast-in-place restores structural strength to deteriorating masonry as it insulates, which stainless liner alone does not do, while flexible stainless liner is faster to install and generally less expensive for a flue that is otherwise structurally sound.
- Will relining fix a smoky fireplace?
- It can, if the smoking was caused by an oversized or damaged flue affecting draft. If the cause is something else, such as negative house pressure or a damper problem, relining alone will not resolve it, which is why a proper diagnosis before committing to a reline is worthwhile.
- Does a liner need to be replaced during a chimney rebuild?
- Not automatically. If the existing liner is sound it can often be reused and reconnected once the rebuild is complete, though a rebuild is a convenient opportunity to install a new liner if the old one was already due for replacement or does not suit a planned appliance change.
Nearby
Other Communities Near Haliburton
Related work
Often Booked Together
Chimney Sweeping in Haliburton
Full mechanical sweep of the flue, smoke chamber and firebox with containment and photos.
Chimney Repair in Haliburton
Targeted repairs to crowns, caps, mortar joints, flashing and liners.
Chimney Cap in Haliburton
Stainless caps and multi-flue covers that keep out rain, snow, animals and embers.
Flashing Repair in Haliburton
Step and counter-flashing repair where the chimney meets the roof.